Origami Globes is devoted to origami Icosahedral Balls made with a ‘Sonobe’ technique where two half-size sheets of origami paper with different patterns are folded into each other. I’ve designed some of these myself, but most come from the wonderful book Floral Origami Globes by the Japanese artist Tomoko Fuse, and I’ve followed her structure in the list below.
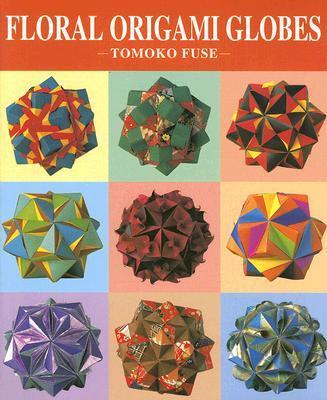
All the globes have the same external pointed Icosahedron form familiar from Origami Balls, but slight changes in the folding produce endless variety – so when combined with interesting paper this makes the model collection really stunning. Tomoko Fuse’s book contains about 51 models: in some cases I’ve made more than one, and I’ve also devised a couple that aren’t in the book – so in total there are about 60 on display here.
30 units for each Icosahedral Ball is a lot of work; in fact making the entire collection became an obsession every afternoon for a couple of months. An easier option is to make only 12 units and assemble them as a 12-unit octahedral ball, as I’ve discussed on the Origami Balls page. This is a lovely project for parties or other medium-scale origami events, and sometime soon I plan to provide some proper instructions here.
1 Basic Sonobe Ball


Sonobe describes the basic structure of all these balls – two pieces of paper are folded into each other to make a two-coloured composite element, then 30 composites are slotted together in a points-into-pockets fashion. The design names one piece of paper as the base and the other a more decorative face, though in what follows the roles often get a bit mixed up.
Part of the trick in making these gorgeous is to pick just the right kind and colour of paper. Here is one which pairs a stripy paper with the kind of left-over pale orange origami paper that all folders have in piles at the back of their cupboards.


2. Type I Base Units
Wedge A – Type 1


The Wedge in the name is the purple bit in this ball. The fact it’s rather narrow in this case makes the ball a bit slithery to put together, but if you use fairly strong non-shiny paper it eventually decides to cooperate.
The expressions Type I, II and III refer to different forms of the ‘base’. The distinction is irrelevant here, but basically it refers to whether the ends of the parallelograms end up slotted into the pentagonal points or the triangular ones on the stars. This affects some of the designs later on…)
Wedge B – Type I


Again the Wedge is the solid blue piece: this time it’s a little wider so things are a little more stable, though not a lot. But sometimes the paper is what makes it, and in this case it definitely did: the patterned stuff is a good firm-but-thin paper and the model has a nicely robust feel (…must…buy…more…paper…NO, STOP IT!)
I fell to thinking that that large area of pattern could be useful for any design I wanted if I could print my own paper. I tried a Union Jack but the geometry just didn’t come right – but I did manage to make a Welsh one with a red dragon and a green swash. It’s not superb, but it is the only Welsh Kusudama I’ve discovered anywhere in the world!


Wedge A – Variation
Wedge B – Variation
Section A – Type I
Section B – Type I
Coloration – Type I
Bows – Type I
I haven’t made any of these these yet, but do scroll on…there are some beauties further down.
3. Type II Base Units
Alternative Pockets – Type II
Wedge Pockets – Type II
Ruffles – Type II
Rolled Pockets – Type II


Wow – what a cracker!
Covered Bows – Type II
Petals – Type II


Chrysanthemums – Type II


Chysanthemums is somehow particularly appealing. In the book Fuse makes it with just two colours, but even there she uses a delicate see-through white for the flowers and sets them on a deep purple backing. I thought the five-fold nature of the flowers made it worth picking out the five-fold symmetry, and it also used up a tiny part of my stash of traditional origami paper – so here’s the result.
One thing to notice about the Chrysanthemum form is that it transfers neatly to Type III bases so it appears again as a triangular form in the Type III section. Fuse doesn’t mention this, so I reckon this is a new one that isn’t in the book!
Narrow Sashes – Type II


Narrow Sashes is very difficult to assemble because everything depends on getting the sashes to tuck under each other – and some of the tucks are only a millimetre or so. I would have done better to use rougher papers – these were a bit too shiny for this model – but after a lot of cursing and shouting it came together in the end.
Wide Sashes – Type II


Wide Sashes isn’t a whole lot easier than Narrow Sashes, but the overlaps are a little bigger and the whole thing induces less apoplexy when you try to assemble it.
Narrow and Wide Sashes have some similarity with two Parallelograms models later on…and likewise they’re a bit of a nightmare to put together.
4. Type III Base Units
Some of the earlier models didn’t quite justify all the hard work – which is partly why I haven’t made them all yet. But this section of the book gets properly into the job and produces a number of models which are not only beautiful in form but very rigid in construction…and are generally a joy to make (apart from a couple which need that dreadful stuff, glue!)
Pseudo-Chrysanthemums – Type III


I’ve called this one Pseudo-Chrysanthemums because it’s not in Tomoko Fuse‘s book but is a Type III version of Chrysanthemums in her Type II Section. For this one I reverted to the usual two colours, though I went for vibrant raspberry for the corners and a strident black and white design for the infill.
Rhombic Patches – Type III


Rhombic Patches looks gorgeous – in fact it looks like many a proper polyhedron model – but its greatest failing here is that it needs glue to hold together. But with that said – I made an early one in the US with some stunning red-yellow paper that I bought in New York; and I left it there when I returned to the UK. In the UK I have a small icosahedral version but there isn’t enough of the red-yellow paper to make an icosahedral one – but I do have a version made with green-yellow paper instead…


Small Tucked Bows – Type III


The assembly method here relies on small corners folded back from the pink papers, which the corners of the blue sections are slotted into. Unfortunately the result is rather unstable and, like Small Ribbons below, you really have to use glue or tape to hold the thing together. Still, the result is very appealing.
Large Tucked Bows – Type III


The small corners here are a bit bigger and the result is more stable – indeed this one was a complete joy to make and is a beautiful firm model.
Small Ribbons – Type III


Small Ribbons was my first attempt at Small Tucked Bows: but I got spooked by the instability of it and started leaving the Bows out. There’s still, though, some glue holding it together.
There is presumably a Large Ribbons to be made some day, and I suspect there are also Type II versions of each as well.
Center Gathering – Type III


Center Gathering has come as a bit of a shock. It’s very like Large Tucked Bows but it lacks some of the symmetry, so I’d always put off making it. But with orangey-red and blue colouring, both of them on very strong papers, it’s become one of my favourite models.
Curls 2 – Type III – Face A
Curls 2 – Type III – Face B
Curls 2 – Type III – Plain
Center Bows – Type III – Face A
Center Bows – Type III – Face B


This one set off as a rather desperate attempt to use up a stock of pale yellow paper and some strange two-sided stuff from a box which mainly lacked enough symmetry to make it useful: but the result is stunning!
Center Bows – Type III – Plain
Curves – Type III


Curves is not especially difficult to make, but there are some points where you have to resist the instinct to make a crease if the curves are to ome out correctly. I developed a brilliant idea to deal with this by including stiffening made from blank Overhead Projector Slides: but these proved so strong and springy that I then needed sticky tape and glue to stop the thing flying apart…and in the end I threw all the extra measures away and just made it from scratch, very carefully. The result is rather fantastic, though it looks better in real life than in the photos.
Butterflies – Type III

I made Butterflies a long time ago and, like Rhombic Patches, it needs glue to hold together. (I might have an idea nowadays which avoids glue, but I haven’t tried it yet.)
For the butterfly elements I used a gauze which I’d bought years ago in a fit of enthusiasm, not knowing at the time that the stuff was impossible to fold accurately and would fall apart if it ever got near water or even slightly damp fingers. Since then it had sat at the bottom of my origami stash and this seemed a perfect chance to use it up – but in the end the springyness of the gauze, the weakness of the black base paper, and the ickyness of the glue, made it all less than satisfactory. So after 6 months gathering dust I chucked it…perhaps I shouldn’t have, but there we go. Another day I’ll make a new one.
5. Type II & III Bases and Type III Units
Parallelograms – Type II


The Sashes balls are difficult because there’s very little overlap in the sashes to tuck behind; the Parallelograms balls make this a little better by handling the tucked parts slightly differently – but the trade-off is that this makes the whole thing a little more flimsy. Annoyance and frustration follows, which suggests I should have used a rough thick paper rather than ordinary origami stuff – but I had a stash of the pale yellow and brown papers to use up!
Parallelograms – Type III


Again this one was a bit of a struggle to put together – though it looks fine now it’s complete.
Triangle Pockets – Type II


This was one of those ‘make it in a morning’ balls that just went by without a hitch and makes a really solid addition to the collection. Curiously I think the photo in the book shows something else – possibly a mirror reversal of the design.
And here is another of the same design. It’s perhaps less stunning from a long distance but it’s very attractive close-up.


Triangle Pockets – Type II – Alternative 1


The blue-check paper here is very crisp and fresh: I searched hard for a matching two-coloured paper to match it, and black-yellow seemed to work. It’s a wonderfully strong robust model, but for once I had to photograph it against a non-black background!
Triangle Pockets – Type II – Alternative 2


Alternative 2 is again simply a slight tweak to the usual folding on the ‘face’ elements. The effect here is to produce the yellow streaks (which are on the reverse side of the brown spotty paper used for the ‘faces’) and to leave just the green streaks from the ‘bases’.
To get the best effect from these streaks it’s obviously important to choose papers and colours which have a bit of ‘show’ about them… so here is a beautiful model made in 2020 with very attractive paper bought at the Walters Art Museum in Baltimore. The fancy paper is the blue-and-pink flowery part; the pink streaks are it’s reverse side; and the black is simply black office-grade paper as the ‘base’ part of the Sonobe units.


But – oh dear – I stood this one on some blue paper and the blue just called out to me: so I pulled the black parts out and replaced them with blue.


Happily the black parts then contributed to a furthur model made with more of the paper from Baltimore…


Triangle Pockets – Type III


This one’s quite a stunner with these papers, though as for all Triangle Pockets Type III balls the last few insertions were very fiddly. You have to be very patient and have an array of ‘poking tools’ to get it to work.
Triangle Pockets – Type III – Alternative 1


Triangle Pockets – Type III – Alternative 2


Alternate Fixes – Type II


Alternate Fixes – Type II – Alternative 1
This one is a particularly pretty one. And although I didn’t pick the colours with a funeral in mind, this one is now part of the belongings of a dear deceased friend.


It must be a design for giving away… here is an earlier one that I gave away a while ago:

Alternate Fixes – Type II – Alternative 2


This one has a characteristic ‘circular saw-wheel’ pattern, which is useful when you’re looking over over old photographs and trying to work out precisely which one is Alternative 2 of Type… etc, etc.
Alternate Fixes – Type III


Alternate Fixes – Type III – Alternative 1

Alternate Fixes – Type III – Alternative 2


Corner Pockets – Type II


I’ve made at least four copies of this model and given two of them away: it’s a really nice one to make and always has a good ‘wow’ factor. Recently I’ve designed and made an octahedral one for an Origami Birthday Party.


Someone challenged me to make an origami model in Chrome Yellow and Black, so this is what resulted. It’s stunning!
With such strong colours it’s tempting to use Photoshop to explore what the model might look like if we cycled the colours a bit. Here are the amazing results…


So it was only a matter of time ’til I made one in a different colour…


…and again we can cycle the colours for a stunning collection…


Here are instructions for making one of these balls:
Here is a complete set of pictures illustrating the instructions…


…and here are a similar set for a pink one:


And here is one made from paper where the pattern size was unhelpful, so I cut everything down to a good size. The result was well worth the extra effort with those solid black-and-white squares appearing.


Corner Pockets – Type II – Alternative 1


This one is a very attractive model; indeed although it includes the usual ‘seams’ between the red and green triangles these seem to disappear – perhaps because of the two contrasting colours, or perhaps because the paper I used was so good.
Corner Pockets – Type II – Alternative 2
Corner Pockets – Type III


Doing Corner Pockets in Type 3 should switch the ‘covered’ parts from the 5-pointed areas to the triangular corners – and indeed that’s what happens. As before, there’s a slightly annoying ‘seam’ down the corner parts – and because it’s now on the corners it’s more obvious. But other than that, the effect is of course very appealing.
Corner Pockets – Type III – Alternative 1


By this point in the book Tomoko Fuse is running out of space, so this one doesn’t get a photograph. Mine might just be the only one of these which has ever had a wide publication!
Corner Pockets – Type III – Alternative 2


Last, but certainly not least. This one, like most of the rest, is very appealing.
Next step is Origami Kusudama